How To Install Dayz Server On a VPS
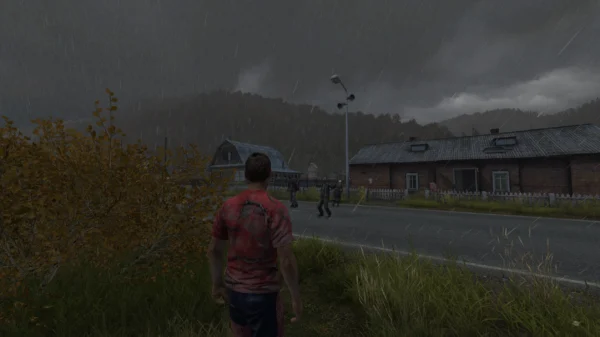
How To Install Dayz Server On a VPS. Setting up a DayZ server on a VPS can be a great way to host a custom experience for you and your friends. I’ll guide you through it step-by-step. This guide assumes you’re running a Windows-based VPS, as that’s the most straightforward way to host a DayZ server. Let me know if you’re on Linux instead — it’s a bit more complex but still doable.
⚙️ Prerequisites:
- A Windows VPS with at least:
- CPU: high speed 4.5+Ghz (DayZ is CPU intensive)
- RAM: 8GB minimum (16GB recommended)
- Disk: SSD with 20GB+ free space
- Windows Server 2016 or newer
- An RDP client (Remote Desktop) to access the VPS
- Steam account (free) with a copy of dayz
- SteamCMD (used to download DayZ server files)
🔧 Step 1: Connect to Your VPS
- Use Remote Desktop to connect to your VPS using the IP, username, and password provided by your host.
📥 Step 2: Install SteamCMD
- Create a folder like
C:\SteamCMD - Download SteamCMD from the official site: https://developer.valvesoftware.com/wiki/SteamCMD
- Extract the ZIP into the folder.
- Run
steamcmd.exeonce to let it set itself up.
📦 Step 3: Download the DayZ Server
- Open
steamcmd.exe - Run these commands one by one:
login anonymous force_install_dir C:\DayZServer app_update 223350 validate quitThis will install the DayZ Dedicated Server files intoC:\DayZServer.
📂 Step 4: Configure the Server
- Go to
C:\DayZServerand find theserverDZ.cfgfile. If it’s missing, copyserverDZ.cfgfrom thempmissionsfolder as a base. - Edit
serverDZ.cfgto configure basic server settings:hostname = "My Custom DayZ Server"; password = ""; passwordAdmin = "adminpassword"; maxPlayers = 60; verifySignatures = 2; disableVoN = 0; timeAcceleration = 6; timePersistence = 1; - Set the mission in the server launch parameters (see next step).
🚀 Step 5: Create a Server Startup Script
- In the server folder, create a
.batfile (e.g.,start-server.bat) with:@echo off start DayZServer_x64.exe "-config=serverDZ.cfg" "-port=2302" "-profiles=ServerProfile" "-mod=" "-mission=.\mpmissions\dayzOffline.chernarusplus" - Double-click this batch file to start your server.
🌐 Step 6: Port Forwarding (Optional)
- If you’re on a hosted VPS, ports should be open by default.
- Ensure these ports are open in Windows Firewall:
2302-2305UDP
To open ports:
- Go to Windows Defender Firewall > Advanced Settings
- Add Inbound Rules for:
- UDP 2302–2305
✅ Step 7: Test It Out
- Launch DayZ and go to Community Servers
- Use the filter to find your server by name
- Or, connect directly using IP
🛠️ Optional Additions
- Mods: Install mods via the
@ModNamefolders and add-mod=@Mod1;@Mod2to the.batfile - Persistence: Server saves character/item data over time (enabled by default in config)
- Admin Tools: Use tools like DZSALauncher or admin logs for better server control
Installing mods on your DayZ server is one of the best parts of customizing it! I’ll walk you through the full process, from downloading to loading mods on your server. We’ll assume you’re using the Steam version of DayZ and SteamCMD for the server.
🧱 Basic Mod Structure
DayZ mods usually come with a folder like @ModName and include:
addons\folder with.pbofiles- A
meta.cppormod.cppfile - Optionally: keys for verifying signatures
🔻 Step 1: Download Mods from Steam Workshop
Option 1: Manually via Steam Client (most common)
- On your local PC, go to the Steam Workshop for DayZ:
https://steamcommunity.com/app/221100/workshop/ - Subscribe to the mods you want.
- They’ll download into:
C:\Program Files (x86)\Steam\steamapps\workshop\content\221100\ - Each folder is named by its Workshop ID. For example:
1559212036= CF (a required framework for many mods)
📤 Step 2: Upload Mods to Your VPS
- Use an FTP client like WinSCP or FileZilla
(Or just drag/drop over RDP) - Upload each mod folder to your DayZ server directory, e.g.:
C:\DayZServer\@CF\ C:\DayZServer\@Community-Online-Tools\
🔐 Step 3: Set Up Keys for Server Signature Check
- Inside each mod, look for a folder named
keys(or sometimesserverkeys) - Copy the
.bikeyfiles from each mod into:C:\DayZServer\keys\If thekeysfolder doesn’t exist, create it.
⚙️ Step 4: Add Mods to Your Startup .BAT
Edit your start-server.bat like this:
@echo off
start DayZServer_x64.exe ^
    "-config=serverDZ.cfg" ^
    "-port=2302" ^
    "-profiles=ServerProfile" ^
    "-mod=@CF;@Community-Online-Tools" ^
    "-mission=.\mpmissions\dayzOffline.chernarusplus"
🔁 Separate mods with a semicolon
;, no spaces!
📄 Step 5: Modify serverDZ.cfg (if needed)
Some mods need entries in your config file or init scripts. Always check the mod’s Workshop page or documentation. You might need to:
- Add types to
types.xml - Add custom spawn items
- Use a
serverModparameter for admin tools
Example: For Community-Online-Tools (admin tools mod):
-mod=@CF;@Community-Online-Tools
-serverMod=@Community-Online-Tools
✅ Step 6: Test and Troubleshoot
- Launch the server
- Check the console for errors like missing
.pbofiles or mod mismatches - Join the server using DZSALauncher or manually with mods loaded
🛠 Recommended Mods to Start With
@CF– Core Framework (required for many mods)@Community-Online-Tools– Admin tools
Now let’s get your DayZ server fully set up for DZSALauncher compatibility and auto-updating mods with SteamCMD. These two steps will streamline things a lot, especially if you plan to add more mods or share your server with others.
🧭 PART 1: DZSALauncher Compatibility
DZSALauncher (DZSALauncher) makes it super easy for players to find and join modded servers — it automatically downloads the required mods too.
✅ Step 1: Add Your Server to DZSALauncher
- Go to DZSALauncher
- Scroll to the bottom and click “Add your server”
- Fill out:
- IP Address and Port (usually
2302) - Server Name
- Discord/Website (optional)
- IP Address and Port (usually
Once it’s approved, players will be able to search and join your server with one click.
🧱 Step 2: Mod Folder Naming Convention
DZSALauncher matches mods using folder names based on Steam Workshop mod names, not @CF style names. So we have to fix that.
⚠️ Example:
Instead of:
C:\DayZServer\@CF
Rename to:
C:\DayZServer\@CF - Community Framework
Or even better, copy them from the Steam Workshop content folder with full names:
@CF - Community Framework
@Community-Online-Tools
@ZomBerry Admin Tools
✅ The folder names must exactly match how they appear on Steam (caps/spaces matter).
📝 Step 3: Create a mods.txt File
DZSALauncher reads a file called mods.txt to determine what mods to load.
Create a text file in your server directory called:
mods.txt
Add your mods like this (one per line, no @):
CF - Community Framework
Community-Online-Tools
ZomBerry Admin Tools
🔧 Step 4: Modify Your .bat to Match
Make sure your -mod string in the .bat file reflects the renamed folders:
-mod="@CF - Community Framework;@Community-Online-Tools;@ZomBerry Admin Tools"
🔁 PART 2: Automatically Updating Mods with SteamCMD
You’ll need the Workshop ID for each mod. You can get them from the URL of the Workshop page.
Example:
https://steamcommunity.com/sharedfiles/filedetails/?id=1559212036
So the Workshop ID is 1559212036
📁 Step 1: Create a SteamCMD Script
Make a file called update_mods.txt in your SteamCMD folder with this structure:
login anonymous
workshop_download_item 221100 1559212036
workshop_download_item 221100 1564026768
workshop_download_item 221100 2465669579
quit
Replace those IDs with your own mod list.
🚀 Step 2: Run the Script
Use this command to run it:
steamcmd +runscript update_mods.txt
The mods will download into:
C:\Program Files (x86)\Steam\steamapps\workshop\content\221100\
Each folder will be named with the Workshop ID.
📦 Step 3: Sync Mods to Server Folder
You can manually copy these to your server folder, or use a PowerShell script or .bat to automate that part.
Simple batch example:
xcopy /s /y /i "C:\Path\To\Workshop\1559212036" "C:\DayZServer\@CF - Community Framework"
Automate for each mod you use.
✅ OPTIONAL: Auto Update Script Example
Here’s a basic full .bat script for updating mods:
@echo off
cd /d C:\SteamCMD

:: Update Mods
steamcmd +runscript update_mods.txt

:: Copy Mods to Server
xcopy /s /y /i "C:\Steam\steamapps\workshop\content\221100\1559212036" "C:\DayZServer\@CF - Community Framework"
xcopy /s /y /i "C:\Steam\steamapps\workshop\content\221100\1564026768" "C:\DayZServer\@Community-Online-Tools"

echo Mods updated and copied.
pause
🎯 Summary
✅ DZSALauncher Compatibility:
- Rename mod folders to match Steam names
- Create a
mods.txt - Use
-mod=string with renamed folders
✅ Mod Auto-Updates:
- Use
steamcmd +runscript update_mods.txt - Sync Workshop folders to your server mod folders
Once your server is up and running we made a nice guide on how to edit the loot economy on a DayZ server

